
Zero-Day Research: A Journey Through Lambda Calculus
Introduction In the realm of computer science, abstract concepts often find practical applications. The Lambda Calculus Interpreter[…]

Zero-Day Research: CVE-2024-22088 Lotos HTTP Server Use-After-Free
In the realm of cybersecurity, uncovering vulnerabilities is a critical part of securing software applications. Recently, while[…]

Zero-Day Research: CVE-2024-22087 Pico HTTP Server in C Remote Buffer Overflow
Introduction Buffer overflows are a common and potentially devastating vulnerability in computer systems and applications. In this[…]

Zero-Day Research: CVE-2024-22086 Cherry HTTP Server Remote Buffer Overflow
Introduction Remote buffer overflows stand out for their notoriety and the sheer impact they can have on[…]

Zero-Day Research: CVE-2023-51771 MicroHTTPServer Off-By-One Global Buffer Overflow
Unraveling a Subtle Yet Critical Vulnerability In the ever-evolving landscape of cybersecurity, certain vulnerabilities, though seemingly minor,[…]

Zero-Day Research: CVE-2023-50965 MicroHttpServer Remote Buffer Overflow
MicroHttpServer MicroHttpServer is a simple HTTP web server that implements partial HTTP/1.1. MicroHttpServer can be easily integrated[…]
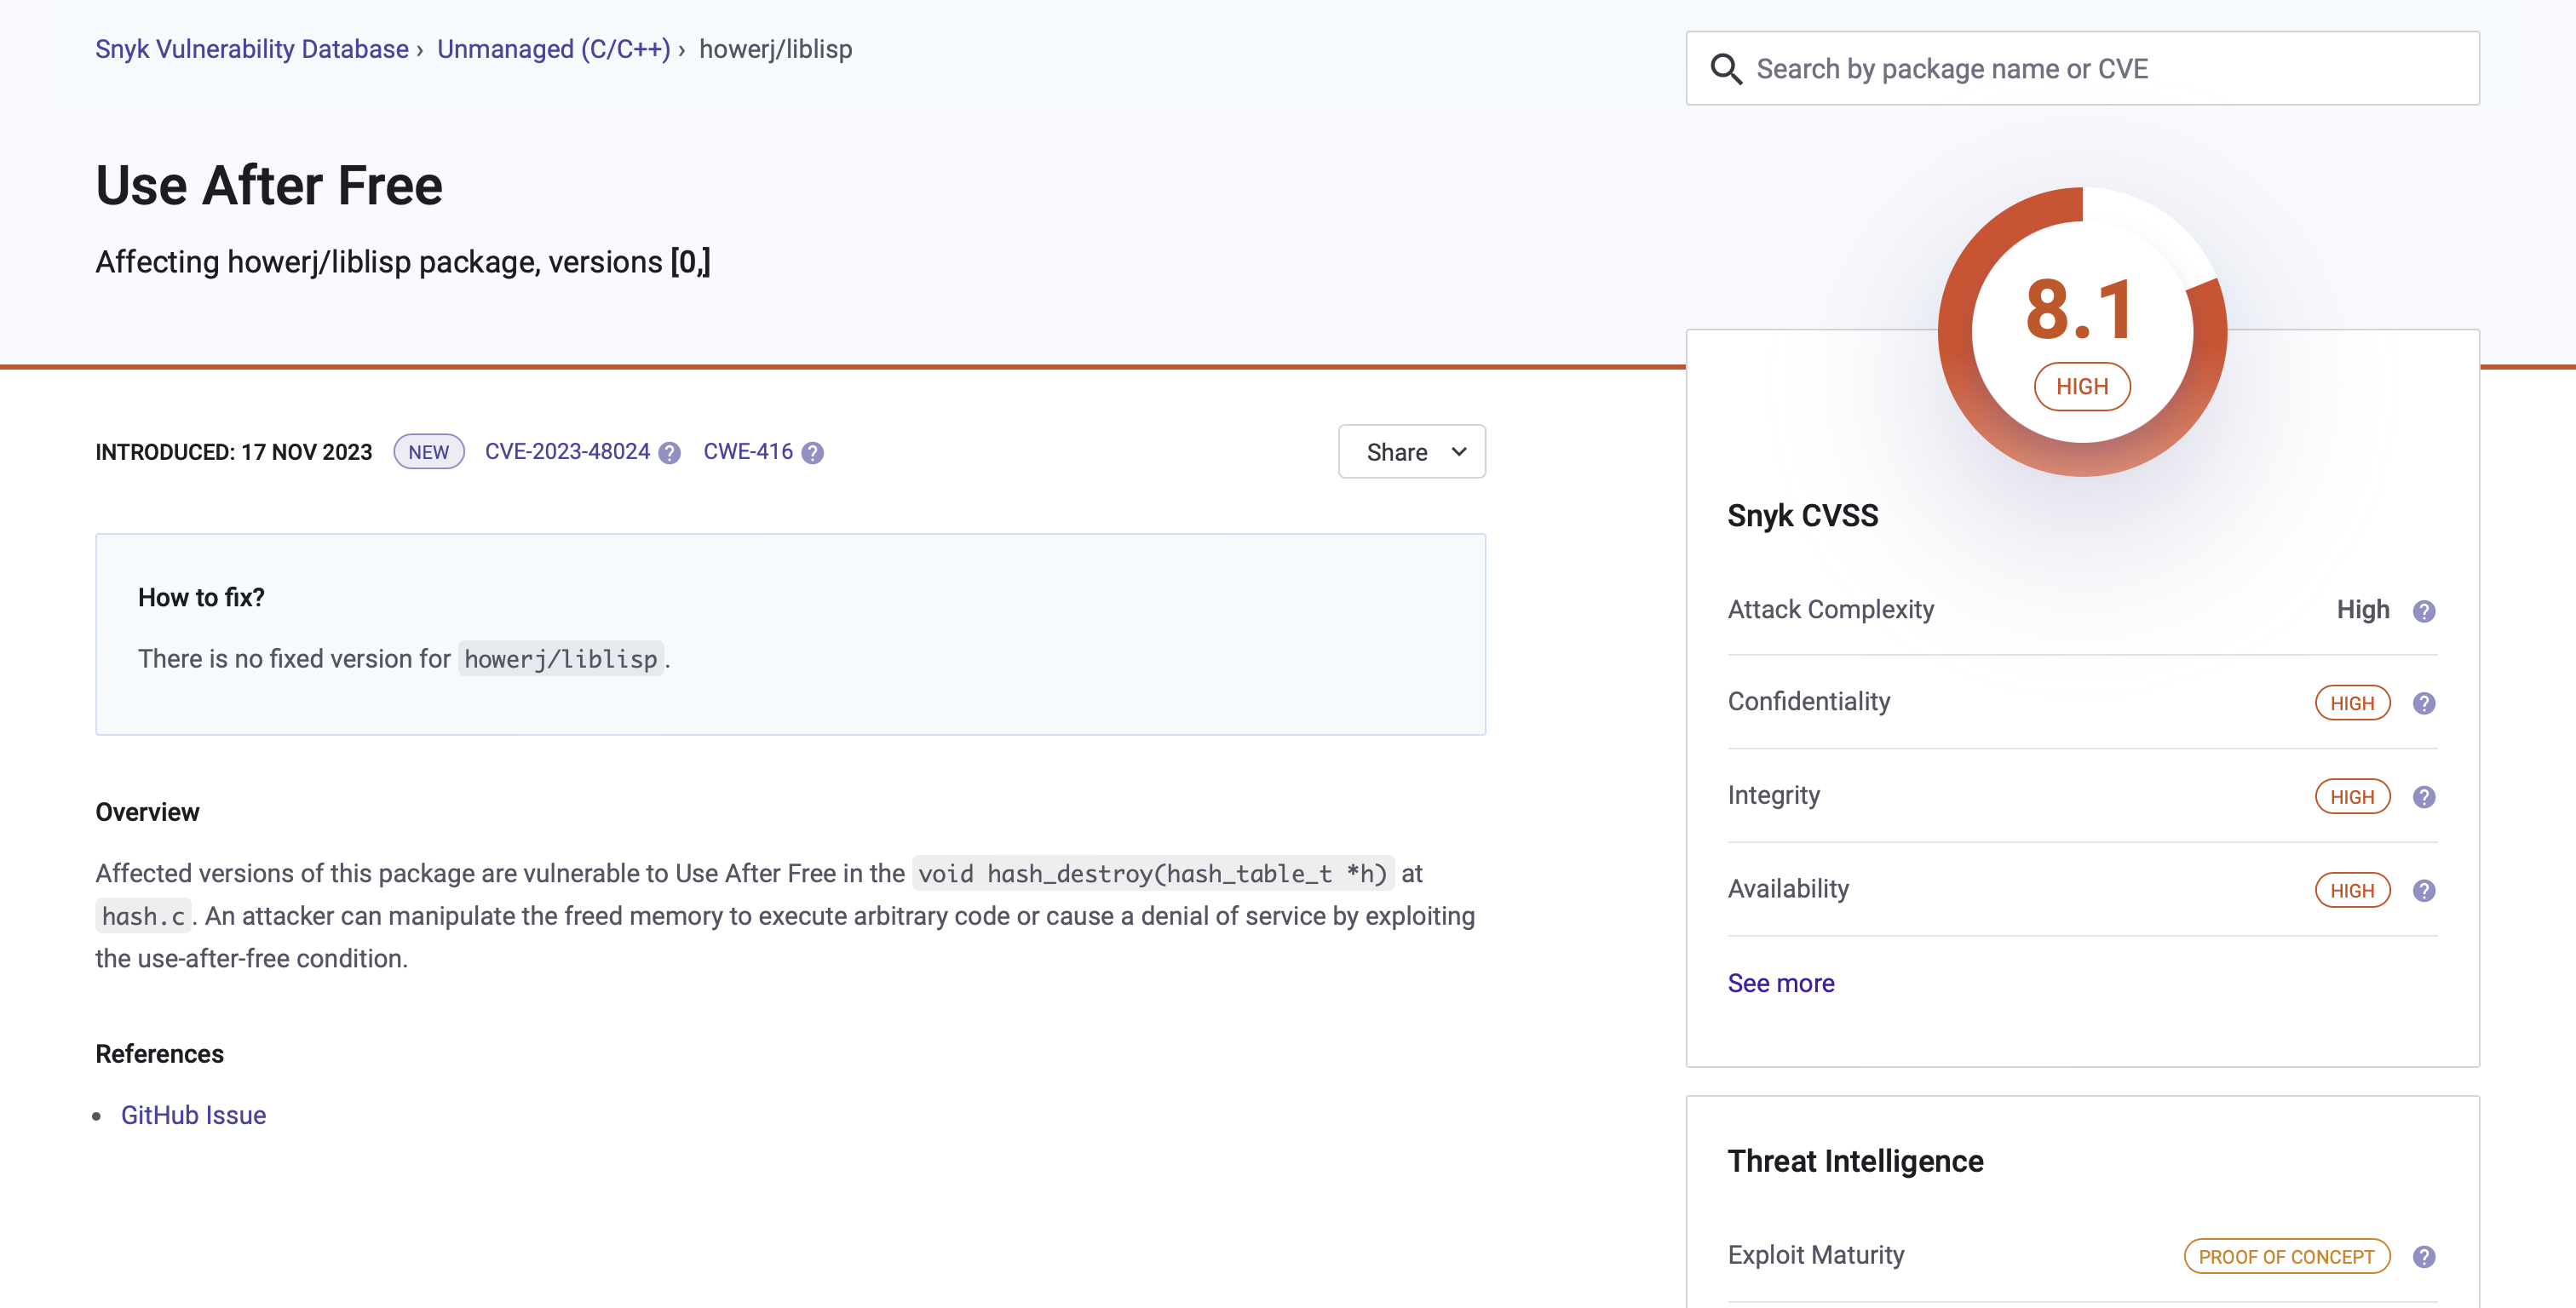
Zero-Day Research: CVE-2023-48024 and CVE-2023-48025 Liblisp Use-After-Free and Out-of-bounds Read
Striking a harmonious balance between high-level abstraction and low-level hardware control, the C programming language proves to[…]

Zero-Day Research: ehttp Use-after-Free (CVE-2023-52266) and Out-of-Bounds Read (CVE-2023-52267)
The ehttp library advertises itself as a ‘simple HTTP server based on epoll’. The primary goal of[…]

Zero-Day Research: PicoC Version 3.2.2 Null Pointer Dereference (CVE-2022-34556) Speedrun
PicoC is a miniature code interpreter developed for C scripting. According to their documentation, PicoC was first[…]

Zero-Day Research: md2roff Version 1.7 Buffer Overflow (CVE-2022-34913)
The best part about security research is the myriad of ways you can find bugs. Sometimes bugs[…]